Gitlab的备份迁移以及升级方法
前几天讲完了Gitlab的安装,再来讲讲Gitlab的备份和异地机器恢复。
实验环境
服务器A,已经有四十个仓库的Gitlab使用版本8.4.2,但因磁盘空间不足准备进行迁移。在此机器上做备份操作。 服务器B,纯新服务器数据盘使用RAID5,并刚按前几天的过程装好Gitlab目前最新版本8.4.4
步骤1,备份
gitlab在不同安装方式下备份指令也有所区别
#使用Omnibus包安装的请用
gitlab-rake gitlab:backup:create
#使用源码安装的请用
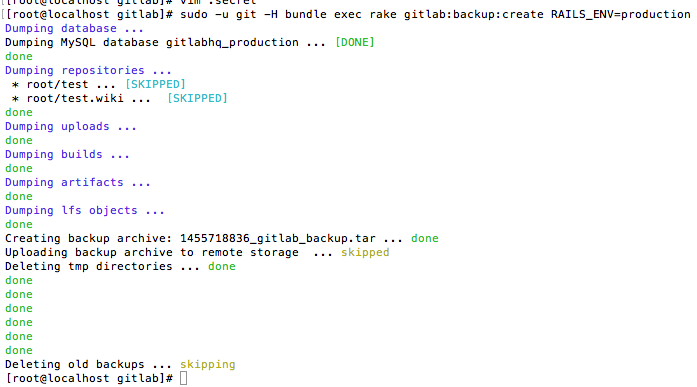
sudo -u git -H bundle exec rake gitlab:backup:create RAILS_ENV=production
备份文件会产生在config/gitlab.yml所指定的目录,如果未做指定默认存储在 /home/git/gitlab/tmp/back下面
文件名格式 [TIMESTAMP]_gitlab_backup.tar
备份成功后会有如下格式输出
步骤2,异地恢复
将步骤1产生的文件传输到服务器B相同目录即可
#Omnibus安装包恢复方法
sudo cp 1393513186_gitlab_backup.tar /var/opt/gitlab/backups/
sudo gitlab-ctl stop unicorn
sudo gitlab-ctl stop sidekiq
sudo gitlab-rake gitlab:backup:restore BACKUP=1393513186
sudo gitlab-ctl start

#源码安装恢复方法
bundle exec rake gitlab:backup:restore RAILS_ENV=production
在本次实验中你会得到如下提示
  [root@localhost gitlab]# bundle exec rake gitlab:backup:restore RAILS_ENV=production
 Warning
  You are running as user root, we hope you know what you are doing.
  Things may work/fail for the wrong reasons.
  For correct results you should run this as user git.

Unpacking backup ... done
GitLab version mismatch:
  Your current GitLab version (8.4.4) differs from the GitLab version in the backup!
  Please switch to the following version and try again:
  version: 8.4.2
非常遗憾的告诉大家,即使小版本号有差异也无法进行恢复,下面我们来进行第三步,将原服务器进行升级。升级后再进行备份恢复操作
步骤3,升级源服务器gitlab版本
#首先停止服务
service gitlab stop
#在线获取指定版本,本次例子我们获取和目标服务器一样的8.4.4版本
cd /home/git/gitlab
sudo -u git -H git fetch -all
sudo -u git -H git checkout -- Gemfile.lock db/schema.rb
sudo -u git -H git checkout v8.4.4 -b v8.4.4
#更新gitlab-shell到合适的版本
cd /home/git/gitlab-shell
sudo -u git -H git fetch
sudo -u git -H git checkout v`cat /home/git/gitlab/GITLAB_SHELL_VERSION` -b v`cat /home/git/gitlab/GITLAB_SHELL_VERSION`
#更新gitlab-workhorse
cd /home/git/gitlab-workhorse
sudo -u git -H git fetch
sudo -u git -H git checkout `cat /home/git/gitlab/GITLAB_WORKHORSE_VERSION` -b `cat /home/git/gitlab/GITLAB_WORKHORSE_VERSION`
sudo -u git -H make
#安装
cd /home/git/gitlab
#例子中我们使用MYSQL库
sudo -u git -H bundle install --without development test postgres --deployment

sudo -u git -H bundle exec rake db:migrate RAILS_ENV=production
sudo -u git -H bundle exec rake assets:clean assets:precompile cache:clear RAILS_ENV=production
#重新启动服务
service gitlab start
service nginx restart
#检查工作是否正常
sudo -u git -H bundle exec rake gitlab:env:info RAILS_ENV=production
到此升级结束,我们只需再把步骤1 2走一次,即可将数据成功迁移到新服务器上。
如果觉得文章内容比较实用,期望获得更新通知,请关注公众号: